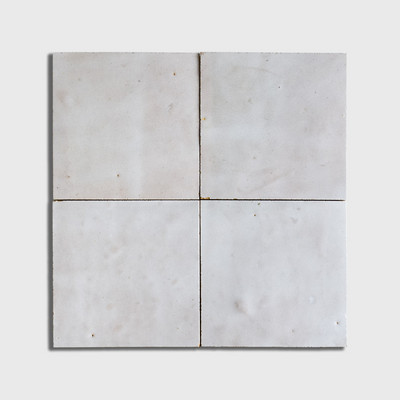
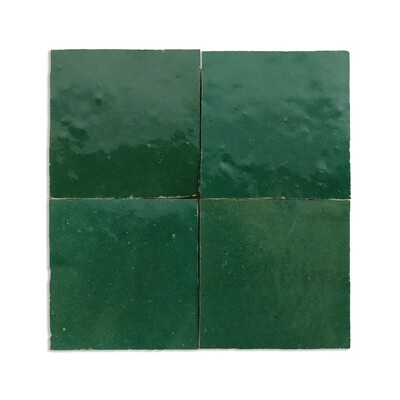
Hueso Zellige Tile 4"x4"x3/8" Matte finish
Color & Finish Options:


Sorry, this product is currently unavailable.
Every lot moves — join the notify list for restock, or browse two close matches from current inventory.
- Est. coverage: 0.111 sqft / per piece•6.67 sqft / per box
About Hueso Matte Zellige Tile
Renovating your home is easier than ever with Hueso Matte Zellige Tile. From bathrooms to kitchens, you can make any location look perfect.
This wall tile with a modern matte finish is sure to lend sophisticated splendor where it's needed. The White Zellige is an elegant choice for any space. It will emphasize the beauty of your tiles while adding character to your design scheme.
For a modern and stylish look, there are many options from floor to wall tiles with matching mosaics that give your home the perfect finishing touch. The size of this product 4x4 x 3/8. You can use the site search to find a different size of this product – we've got it all!
Interior — Residential
Wet Areas
Exterior
Commercial
Before You Start
7 things to checkGet the most out of your Marble Systems zellige tile by following this guide, written specifically for zellige.
- Order at least 15% extra material to allow for cuts, natural variation, and the occasional broken piece in transit. If you'd like a more uniform look, order 20 to 25% extra so you have enough material to be selective; just know that culling out all the imperfect pieces also means losing some of what makes an installation read as authentically handmade.
- Small chips, pits, and the occasional pencil or ink mark from the hand-cutting process are normal on roughly 15 to 20% of tiles. These aren't defects, and matching grout will help blend them in.
- Confirm the tile's rated use on the product page before you start. Zellige is primarily a wall tile. If you're considering it for a floor, especially a wet one, talk to your installer about slip resistance and the tile's naturally sharp, irregular edges first, and lean toward a matte finish or a smaller format if you move forward.
- Use white, polymer-modified thin-set, never gray thin-set and never mastic. Zellige glaze can be translucent enough that gray thin-set shows through and shifts the color.
- Back-butter every single tile. This isn't optional the way it might be with a machine-made tile; it's what compensates for the natural thickness variation and gives a solid, void-free bond.
- Don't rely on spacers the way you would with a uniform tile. Let each tile find its own natural spacing against its neighbors; the organic, slightly irregular joint that results is part of the look.
- This isn't the easiest tile to learn on. The thickness variation and hand-set approach benefit from an installer who has worked with zellige or other handmade tile before.
Confirm Where This Tile Can Go
Check the Usage section of your product page, and confirm with your installer, especially if you're considering a floor or a wet area. Zellige is used overwhelmingly on walls, backsplashes, and shower walls, where its glossy glaze and gentle surface movement catch the light beautifully. Floor use is more debated in the trade; the same glaze that looks so good on a wall can be slippery underfoot, and the tile's naturally irregular edges can be sharp along a floor's traffic path. If you do use it on a floor, a matte finish and a smaller format (which means more grout lines, and more grip) are generally the safer choice.
Prepare a Flat, Sound Substrate
Tile can be installed over most structurally sound substrates that are clean, flat, dry, and free of wax, dust, grease, and other debris. Repair, patch, and level any damaged or uneven areas. Because zellige already varies so much in thickness from piece to piece, starting with as flat a substrate as reasonably possible makes it easier to level the finished surface later; an uneven wall compounds the challenge. For wet walls, such as showers, install cement backer board or a waterproof membrane first.
Dry-Lay and Blend Before You Commit
Pull tiles randomly from every box, not sequentially from one at a time, and lay out a substantial mock-up section before any adhesive goes down. This is the best way to check that color, tone, and texture are distributed evenly rather than clustering in one area. If you're working with a designer or homeowner who wants approval before the full installation, this is the moment to get it.
Choose the Right Mortar
Use a premium white, polymer-modified thin-set, not gray thin-set and not mastic. Because setting zellige by hand, with individual leveling and back-buttering per tile, takes longer than a standard tile installation, work in small sections, about 2 to 3 square feet at a time, so the thin-set doesn't skin over before you're ready for it.
Soak Glazed Tile Briefly, Skip This for Unglazed
If your zellige is glazed, a brief soak, about 1 to 2 minutes in clean water, before setting can help release trapped air from the porous clay body underneath and improve the bond. If your tile is unglazed or a natural, lightly glazed finish, skip this step; soaking unglazed clay can lead to efflorescence, a chalky mineral deposit that's difficult to remove once it appears.
Cut and Drill Carefully
Zellige can be cut with a traditional tile cutter and snapped, similar to older-style ceramic, or with a wet saw for a cleaner edge; either is workable depending on the cut. If you need to drill for fixtures, use a diamond-tipped bit, go slowly, and protect the glaze with painter's tape at the drill point; zellige is sturdy once installed, but a rushed drill hole can crack it.
Back-Butter and Set Each Tile by Hand
Spread thin-set on the substrate, then back-butter each tile individually, adjusting how much thin-set you use tile to tile to help even out natural thickness differences as you go. Press each tile into place with a slight twisting motion rather than sliding it, since sliding tends to create lippage. Let each tile settle into its own natural spacing against its neighbors instead of forcing a uniform gap with spacers. Check your work with a straightedge as you go, but don't try to eliminate every bit of surface movement; the gentle waviness of a zellige wall, and the way it catches light differently across the surface, is the intended effect, not something to engineer away.
Grout the Joints
Wait until the thin-set has cured per the manufacturer's instructions before grouting. Use unsanded grout for the tight joints typical of zellige, generally 1/8" or under; sanded grout can scratch the glossy glaze during application. Many installations use a grout color close to the tile itself for a soft, blended look, though a contrasting color is also a legitimate choice if you want the grid pattern to read more clearly; test your choice on a spare tile first. In wet areas like showers, an epoxy grout offers better water resistance than a standard cementitious one. Wipe away excess grout promptly with a clean, damp sponge, rinsing frequently; haze can be more stubborn to remove from zellige's variable glossy surface if it's allowed to sit.
Seal If Needed, Then Care for the Finish Over Time
A glazed zellige tile face generally doesn't need sealing; the glaze is already the protective layer. Unglazed or very lightly glazed zellige may benefit from a sealer, so check with your supplier for a specific recommendation. Grout is a different story, especially in wet areas: a penetrating grout sealer is recommended for showers and other spots with regular water exposure, once the grout has fully cured.
Clean zellige with a soft cloth and a pH-neutral cleaner; skip harsh, acidic, or abrasive products. The glaze resists everyday water and staining well, so most of the ongoing care is really about keeping the grout clean. Over time, lighter glazes may show some gentle wear or patina, which many people consider part of what makes a handmade zellige installation feel lived-in and genuine rather than a flaw to prevent.
This guide offers general installation information for zellige tile. Actual requirements vary by project, tile finish, substrate, and location. Marble Systems is not responsible for claims resulting from these general guidelines. Always work with a qualified professional tile installer, ideally one experienced with handmade tile, and use setting materials suited to your specific project.